Hi, sorry I didn't post anything yesterday! I had a horrible allergy attack yesterday, and all I wanted to do was find a box of tissues the size of bed sheets.
Ok, first of all, this doesn't look the best. I recommend thinking about buying THIS before you make this. (Yes, it's expensive but it looks a whole lot better!)
You will need:
1. Cardboard boxes
2. Brown paint
3. Foam board
4. Black or brown cording or yarn
5. Two small paper clips
6. Something curved, I used pieces of swim noodle with stick supports
7. White fabric
8. A lot of hot glue, pencil or pen, and scissors
9. PATIENCE
Step 1. Find a box that is wide enough for two dolls to sit on one of the short flaps, and a lot longer than mine.
Step 2. Fold in all the flaps except for one of the smaller ones. (Am I confusing you? Just look at the pictures.)
Step 3. Now put supports in a smaller box, and put it in for the floor of the wagon.
Step 4. Glue a small closed box under the open flap...
....and glue the flap on top of it. This is the the seat.
Step 5. Now paint it all brown. I didn't have enough brown paint, so I used a bunch of paper bags.
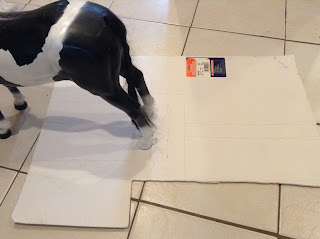
Step 6. Put your horse on your foam board and draw the shape you want.
Step 7. Now paint it brown. Mod podge if you want.
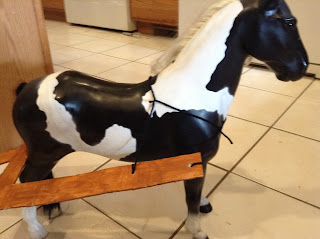
Step 8. Hold it like this on your horse, and punch two holes where the middle of the horse is.
Put the ed of what you just made under the seat, so you know how low it will be. Add cording or yarn across the middle so it hangs.
Step 9. So the horse doesn't walk right out from under it, put some at the top, but make it taunt.
Now try it on your horse, mine is too low, so.....
...add some more yarn to hold it up.
Step 10. Take two small paperclips...
...unbend them...
....and make these two shapes.
Step 11. Stick the one with a loop under the seat of the wagon, as far in as it will go.
If the ends poke out, bend them out of the way.
Stick the other one in the thing you hitch the horses to, secure it with a little glue.
Now you can hitch your horse to your wagon. And feel free to hitch up two horses, but we only have one.
Step 12. Paint some wagon wheels on the side of the wagon, I considered painting the bottom as if you could see under neath it, but I decided not to.
Step 13. Add little railings to the sides of the seat, you can use scrap foam board/cardboard.
Step 14. Glue on the noodles, and sticks so they stay upright. Now start adding the fabric. Glue along the inside edge, leaving four inches out on each end. Drape you fabric over the noodles, and glue on that side.
Step 15. Fold the extra four inches of fabric in and over the noodles and glue.
It should now look like this.
You're done!
I will post the special post tomorrow or the day after, I'm not sure. It depends on when I finish it. Bye! ;)


Oh my gosh I absolutely LOVE it. Thank you sooooooooooooooo much for doing this. God has just filled you with incredible talent and creativity I hope that later in life you will be able to share it with more and more people. (PS the next craft series i think you should do would be bakery treats.
ReplyDelete~Love AG
merci boucoup! (thats french, I think i spelled it wrong, but it means thank you very much) :)
Deleteand thats a good, idea!
whoops! random coma in there. :P
DeleteOui (thats french for yes, except its pronounced we) i know a little french although not a lot. :D
Delete:)
DeleteOh my gosh I absolutely LOVE it. Thank you sooooooooooooooo much for doing this. God has just filled you with incredible talent and creativity I hope that later in life you will be able to share it with more and more people. (PS the next craft series i think you should do would be bakery treats.
ReplyDelete~Love AG
sorry about the double.
ReplyDelete